
Zabbix4.4インストール方法(CentOS7+MySQL8+PHP7)
はじめに
Zabbix4.4のインストール方法について記載します。各ミドルウェアのバージョンは下記のとおりです。
| OS、ミドルウェア | バージョン |
|---|---|
| LinuxOS | CentOS Linux release 7.7.1908 |
| Zabbix-Server | 4.4.7 |
| Webサーバ | Apache 2.4.6 |
| DBサーバ | MySQL 8.0.19 |
| PHP | PHP 7.3.17 |
なお、Zabbix-Server、DBサーバ、PHPのミドルウェアについては、それぞれのリポジトリを追加し、なるべく最新版のものを使用します。
firewalldとSELinuxは無効です。有効の場合はそれぞれ無効にしたうえで実施します。
インストール手順
各ミドルウェアのインストール
まず、本手順はwgetを使い必要なrpmをダウンロードします。その為、インストールがされていない場合は下記コマンドでインストールをして下さい。
# yum install -y wget・MySQLのインストール
MySQLのインストールをします。ただし、CentOS7の標準リポジトリからは最新のMySQLをダウンロードできないためMySQLのリポジトリもインストールします。
※すでにリポジトリが登録されている場合は、1行目のコマンドは不要です。
# rpm -ivh https://dev.mysql.com/get/mysql80-community-release-el7-1.noarch.rpm
# yum -y install mysql-community-server mysql-community-devel
・PHPのインストール
PHPと各モジュールのインストールをします。PHPもMySQLと同様、最新版をインストールするためRemiというプロジェクトのリポジトリをインストールします。
※すでにリポジトリが登録されている場合は、1行目と2行目のコマンドは不要です。
# yum -y install epel-release
# yum -y install http://rpms.famillecollet.com/enterprise/remi-release-7.rpm
# yum -y install --enablerepo=remi,remi-php73 php php-devel php-pdo php-mysqlnd php-mbstring php-mcrypt php-gd php-pear php-pecl-apc-devel php-bcmath php-ldap zlib-devel httpd-devel
・Zabbixのインストール
続いてZabbix本体になるZabbix-Server、自分自身を監視するためのZabbix-Agent、コンソール画面を提供するためのZabbix-Webをインストールします。なお、こちらでもrpmコマンドを使い、Zabbixのリポジトリをインストールします。
# rpm -Uvh https://repo.zabbix.com/zabbix/4.4/rhel/7/x86_64/zabbix-release-4.4-1.el7.noarch.rpm
# yum -y install zabbix-agent zabbix-server-mysql
# wget http://repo.zabbix.com/zabbix/4.4/rhel/7/x86_64/zabbix-web-4.4.7-1.el7.noarch.rpm
# wget http://repo.zabbix.com/zabbix/4.4/rhel/7/x86_64/zabbix-web-mysql-4.4.7-1.el7.noarch.rpm
# wget http://repo.zabbix.com/zabbix/4.4/rhel/7/x86_64/zabbix-web-japanese-4.4.7-1.el7.noarch.rpm
# rpm -ivh --nodeps zabbix-web-4.4.7-1.el7.noarch.rpm zabbix-web-mysql-4.4.7-1.el7.noarch.rpm zabbix-web-japanese-4.4.7-1.el7.noarch.rpm
MySQLの設定
MySQLに接続する際の認証方式は以前のMySQLバージョンでは「mysql_native_password」でしたが、8.0以降で「caching_sha2_password」が追加され、当該バージョンのMySQLのデフォルトの認証方式が「caching_sha2_password」となっています。
Zabbixでは「caching_sha2_password」が未対応なので「mysql_native_password」に変更する必要があります。
# vi /etc/my.cnf
---
#default-authentication-plugin=mysql_native_password
 ↓
default-authentication-plugin=mysql_native_password
続いて、MySQLのサービス起動と自動起動を有効にします。
# systemctl start mysqld
# systemctl enable mysqld
MySQLの初期パスワード確認をします。下記の「*****」箇所がMySQL接続時のパスワードとなります。この後に使用するパスワードです。
# grep root /var/log/mysqld.log
2020-04-18T19:42:17.967361Z 5 [Note] [MY-010454] [Server] A temporary password is generated for root@localhost: *****
MySQL接続時のrootパスワードを変更します。
# mysql_secure_installation

Securing the MySQL server deployment.

Enter password for user root:    ※上で確認したパスワードを入力しEnter

The existing password for the user account root has expired. Please set a new password.

New password:             ※新しいrootユーザの任意のパスワードを入力しEnter

Re-enter new password:        ※再度rootユーザのパスワードを入力しEnter

======= 以下からはお好みです ======

The 'validate_password' component is installed on the server.
The subsequent steps will run with the existing configuration
of the component.
Using existing password for root.

Estimated strength of the password: 100
Change the password for root ? ((Press y|Y for Yes, any other key for No) : n   ※すでにrootユーザのパスワードは変更しているので「n」

 ... skipping.
By default, a MySQL installation has an anonymous user,
allowing anyone to log into MySQL without having to have
a user account created for them. This is intended only for
testing, and to make the installation go a bit smoother.
You should remove them before moving into a production
environment.

Remove anonymous users? (Press y|Y for Yes, any other key for No) : y          ※匿名ユーザは不要なので「y」
Success.


Normally, root should only be allowed to connect from
'localhost'. This ensures that someone cannot guess at
the root password from the network.

Disallow root login remotely? (Press y|Y for Yes, any other key for No) : y   ※リモートアクセスでのrootログインは禁止にしたいので「y」
Success.

By default, MySQL comes with a database named 'test' that
anyone can access. This is also intended only for testing,
and should be removed before moving into a production
environment.


Remove test database and access to it? (Press y|Y for Yes, any other key for No) : y   ※テスト用データベースは不要なので「y」
 - Dropping test database...
Success.

 - Removing privileges on test database...
Success.

Reloading the privilege tables will ensure that all changes
made so far will take effect immediately.

Reload privilege tables now? (Press y|Y for Yes, any other key for No) : y      ※権限テーブルの再読み込みで変更した反映をすぐ行いたいため「y」
Success.

All done!
MySQLにログインしデータベース、ユーザを作成して行きます。
*****の箇所は当該データベース接続用。任意のパスワードでOKです。
# mysql -u root -p
Enter password:      ※上記で設定したrootのパスワードを入力しEnter
---
mysql> create database zabbix character set utf8 collate utf8_bin;
mysql> create user 'zabbix'@'localhost' identified  by '*****';
mysql> grant all on zabbix.* to 'zabbix'@'localhost' with grant option;
mysql> FLUSH PRIVILEGES;
mysql> quit;
Zabbixの設定
スキーマとデータをZabbixデータベースにインポートします。
# cd /usr/share/doc/zabbix-server-mysql-*/      ※所定のバージョンのフォルダに移動します。
# zcat create.sql.gz | mysql -u zabbix -p zabbix
Enter password:                     ※zabbixユーザのパスワードを入力
続いてZabbix-Serverの設定ファイルにZabbixデータベースにアクセスする際のパスワードを設定します。
※*****は先ほど設定したzabbixユーザのパスワード
# vi /etc/zabbix/zabbix_server.conf
---
# DBPassword=
↓
DBPassword=*****
ZabbixのWebサーバ設定でPHPモジュールとタイムゾーンの設定変更をします。
# vi /etc/httpd/conf.d/zabbix.conf
---
<IfModule mod_php5.c>
↓
<IfModule mod_php7.c>

# php_value date.timezone Europe/Riga
↓
php_value date.timezone Asia/Tokyo
Zabbix-ServerとApacheのサービス起動と自動起動を有効にします。
# systemctl start zabbix-server
# systemctl enable zabbix-server
# systemctl start httpd
# systemctl enable httpd
もし、firewalldを有効にしている場合はhttpを許可するポリシーを設定してください。(当方の環境では無効にしているので手順は割愛します。)
Webブラウザからの初期セットアップ~ログインまで
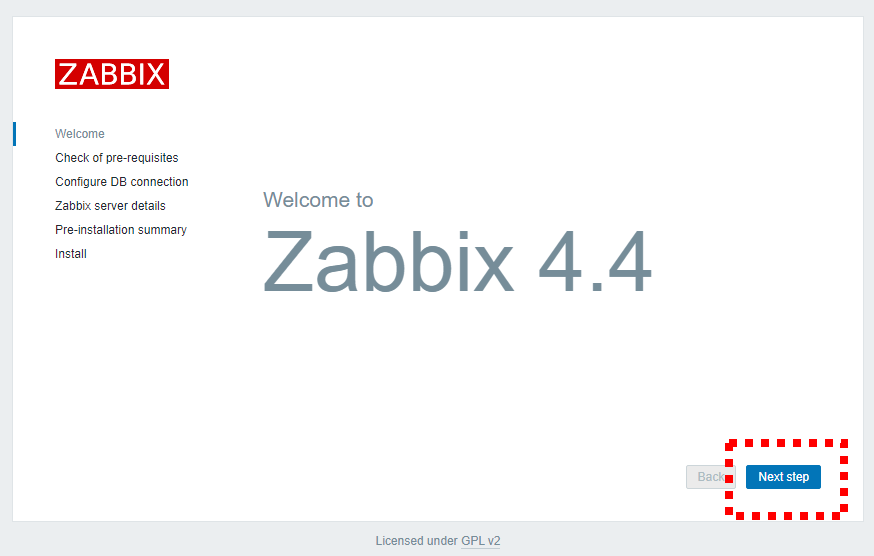
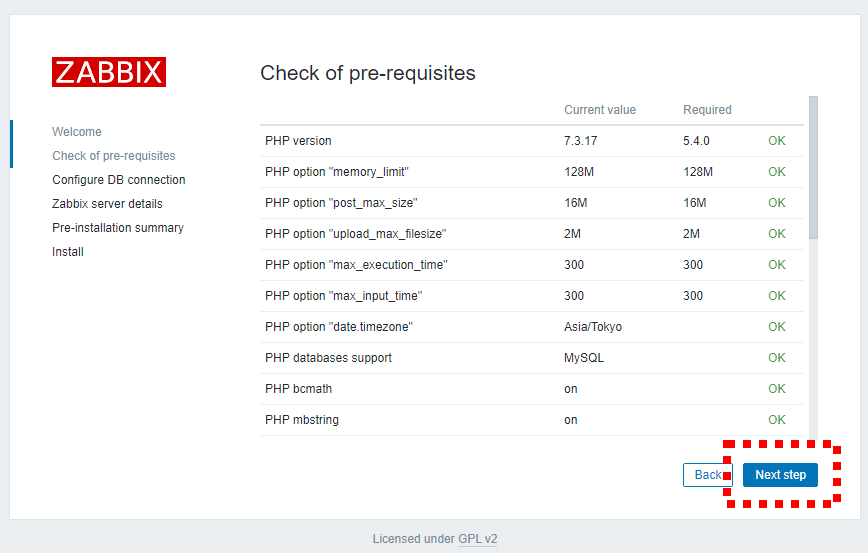
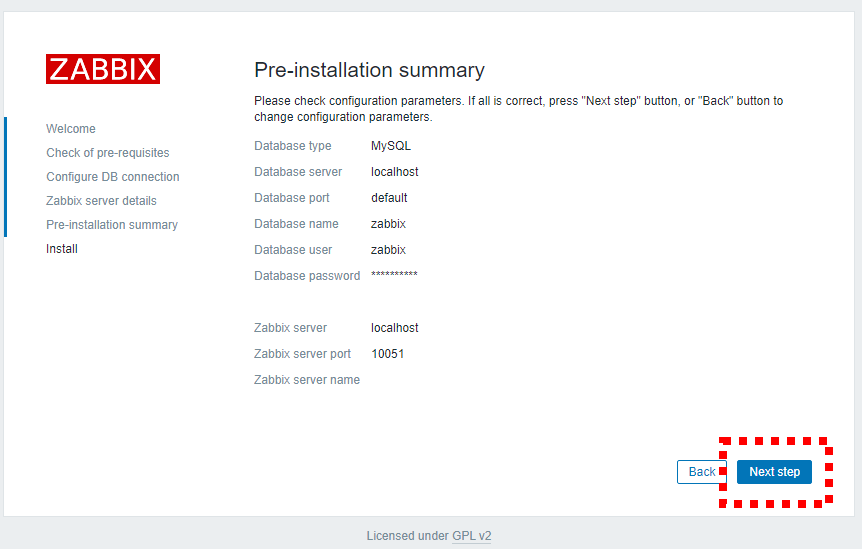
続いてWebブラウザから「http://ZabbixサーバのIPアドレス/zabbix」に接続してください。接続すると下記の画面が表示されますので、右下の「Next step」を押し進みます。
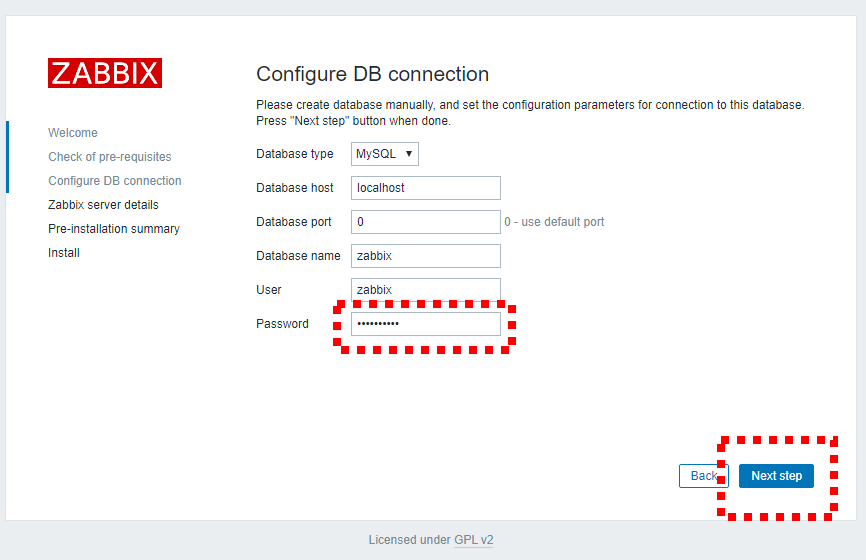
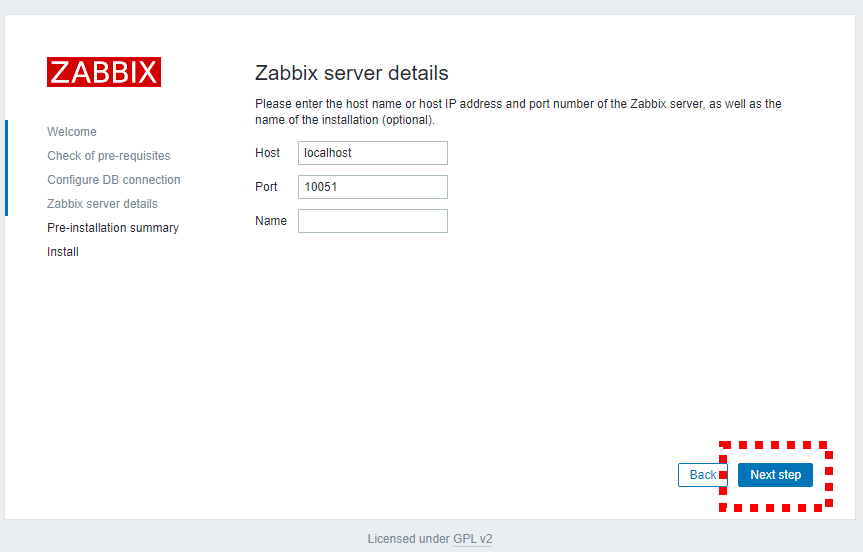
Password欄にMySQLのzabbixユーザのパスワードを入力し「Nexts step」をクリックしスクリーンショットの通り手順を進めます。
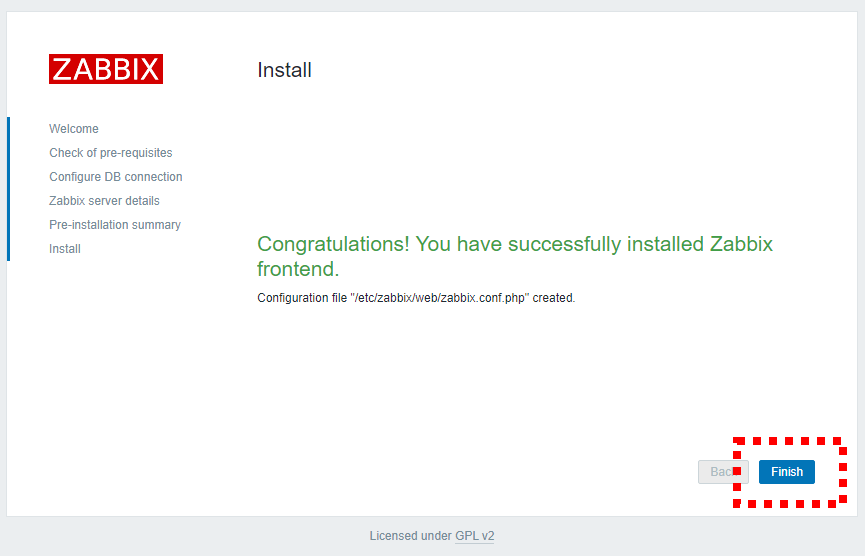
ログイン画面が表示されますので、下記のユーザー名とパスワードで「Sign in」します。
Username:Admin
Password:zabbix
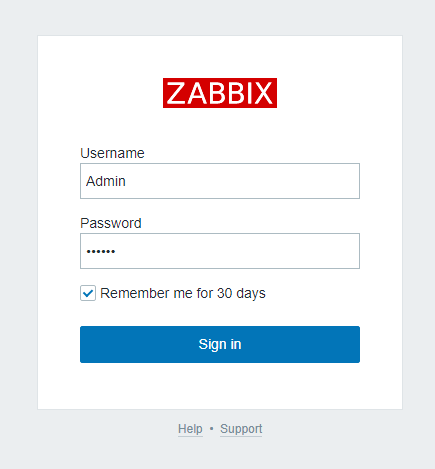
下記の画面が表示されればサインインできました。

以上でZabbix4.4のインストール方法を終わります。